So I decided to under take a little big project. I recently rebuilt my Z3 with the M52TUB28, in layman’s terms it’s a 2.8L straight six. In this year long process I accumulated all of the specialty tools and skills needed to work on 90s BMWs. It’s time I make this investment work for me. Lucky for me the M44 is a much simpler motor since doesn’t have BMWs variable valve timing (VANOS).
Recently one of my fellow local Z3 buddies asked me to help diagnose his issue. After pulling out the plugs and giving it a few cranks we learned it blew the head gasket. How may you ask? A large quantity of coolant nearly hit me in the face as I leaned over the poor motor. After pulling the head off I got it to the shop and the process began. Here are a few key things when rebuilding the head that you can apply at home if you choose to undertake something similar.

Once you get the head off and, on a desk, putting it on something soft is the easiest way to prevent scratches on crucial surfaces. It will also soak up any oil and make it easier to clean between steps. I pulled the cams out while the head was still in the car to make it easier to fish things out.
Since the head is out this makes it easier to do some preventative maintenance and freshen everything up. There are rebuild kits available for most motors that come with all new gaskets and seals. This is the time to:
- Replace valve seals to reduce oil consumption
- Lap valves to ensure good compression
- Clean out gunky oil residue
- Replace all sealing surfaces

To help hit most of these items you have to remove the valves. There are multiple versions of spring compressor tools but my preferred one clamps on the face of the valve and the top of the spring. As you tighten the tool it will compress the valve giving you room to remove the keepers. Do not compress the springs more then you have to! This can cause them to fail later. If you see any cracks or chipping replace all of them. At this point you can carefully pull the release and let the spring slide off. On this motor in particular there are a lot of nooks for the tool to get stuck in. Try to keep it as centered on the top of the spring as possible. When removing the valve pay attention to two things. One, how much play it has left, right, down, up. Too much play and you might need to consider new valve guides. Two, pay attention on how easily the valve slides out of the valve seal. Good valve seals will require a good tug to get them to release the valve and the spring will usually fly off. If the valve just falls out it’s time to get new ones. Luckily, they are cheap and easy to replace.
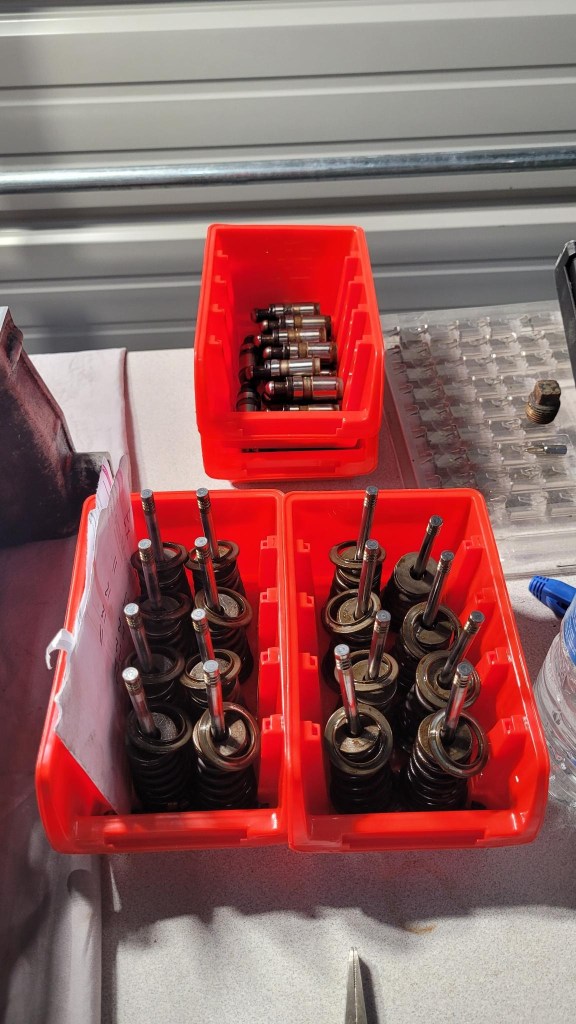
It’s important to stay organized through this process. If you start walking around looking for stuff it’s time to stop. Impatience leads to mistakes! Come back later some of this stuff is expensive. Since we are going to be lapping the valves it’s really not that important to remember which went were but it’s good practice. Once the valves are lapped, they will only, and I repeat ONLY seal in that specific spot. Forgetting where it goes will lead to a drop in compression. I write the location on the bottom with sharpie and place them in order with a sheet marking which is which. Intake valves are almost always bigger in the exhaust making it easy to differentiate. This is due to the pressure difference between the outside air (even if it’s pressurized by a turbine) and the inside of the cylinder being relatively small during the intake stroke compared to the exhaust stroke. Pushing is easier then pulling.
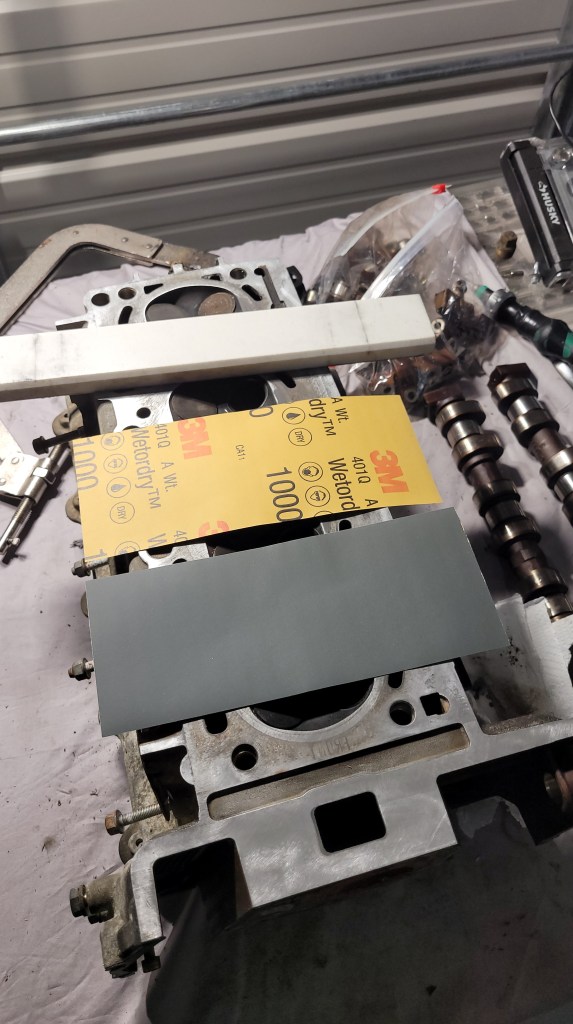
Once all of the valves are out it’s time to clean everything up. First time I did this on my M52 I spent hours rubbing it down with acetone trying to get the old head gasket off. What a waste of time. It is easier to do this with a Utility blade, take it at a 45 angle and gently scrape off the head gasket. Don’t let it dig in and take a step back if it gets caught. The idea is to get the old head gasket material off as much as possible without leaving any marks. If you can feel a scratch with your finger nail it’s going to need to be faced at a machine shop. After passing the entire head it’s time to grab some 1000 and 3000 grit sand paper and acetone. Wipe the head clean with microfiber and acetone. Take the sand paper and wrap it around something flat. I like using a piece of marble tile shelf. It’s cheap, the size is manageable, and its manufacturing process makes it flat within tolerance. With circular motions go over the head until you can run your hand over it and not feel anything on top of the aluminum. After it’s completely flat use the 3000-grit paper to give it a mirror finish. In my case after going through this, certain imperfections just couldn’t be removed.
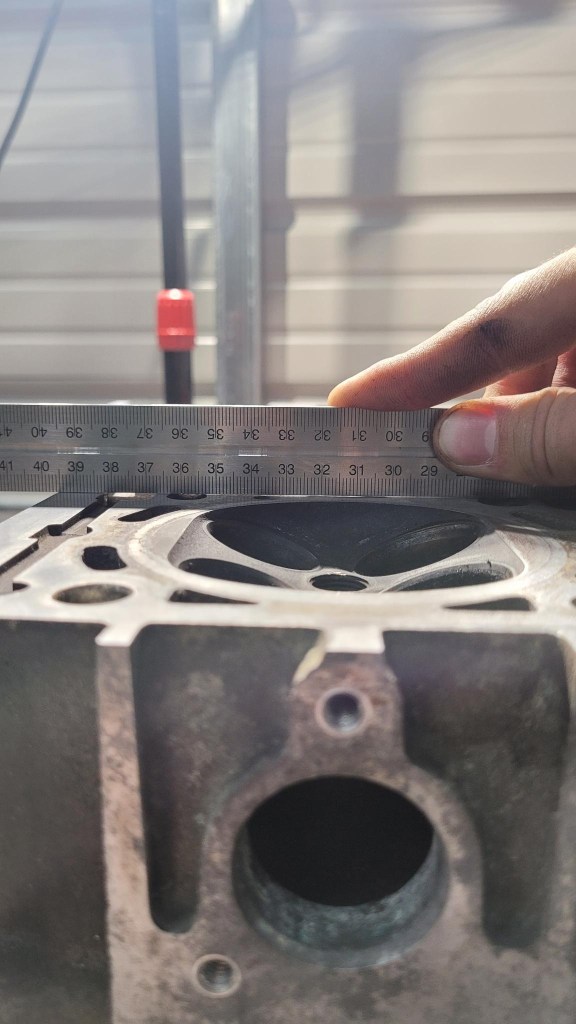

Easiest way to check if the surface is flat is with a straight edge and a light source behind it. On a flat surface like the 2nd picture above there is no light shining through. This head does not seem to be warped as the edges are all straight but there are a tone of flat spots namely around the part where the gasket blew. Between the water jackets, cylinders, and oil passages. The only way to fix this is to resurface it at a machine shop. A local shop quoted $175 to face and clean this head. Now we wait for its return. I have a few theories on how this came to be. Someone could have sanded it with power tools previously which could have led to low spots. It could also have not been cooled properly or fed too quickly through a surfacing machine. This leads the material to heat up and expand. When the bit comes through it takes off the expanded material. It then cools leaving a low spot similar to what can be seen here.
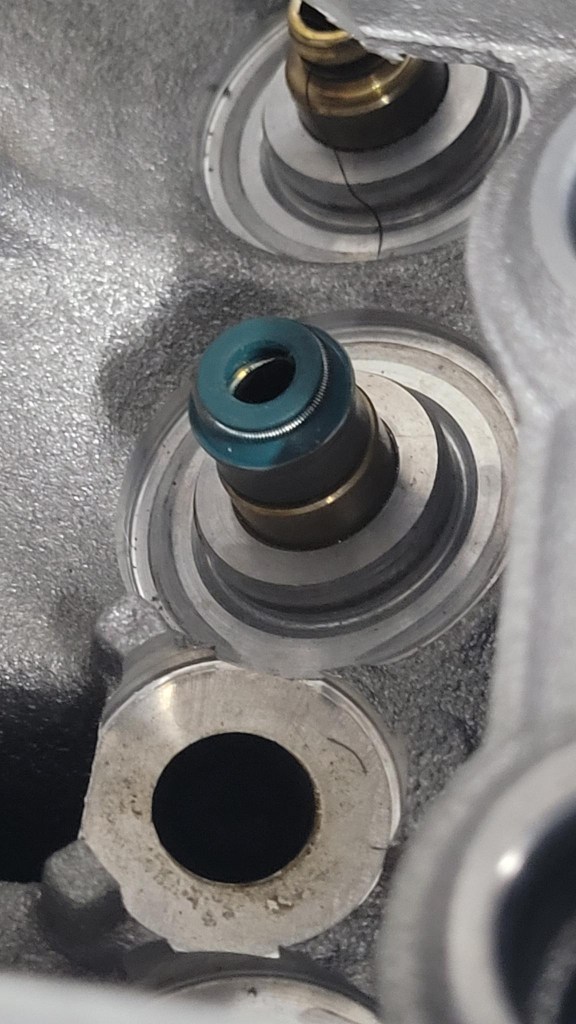
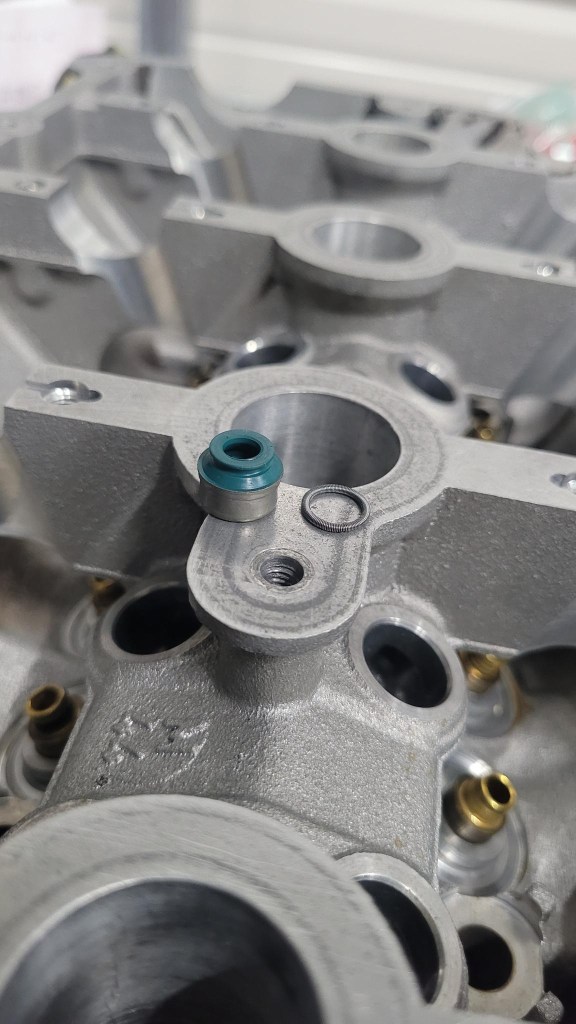


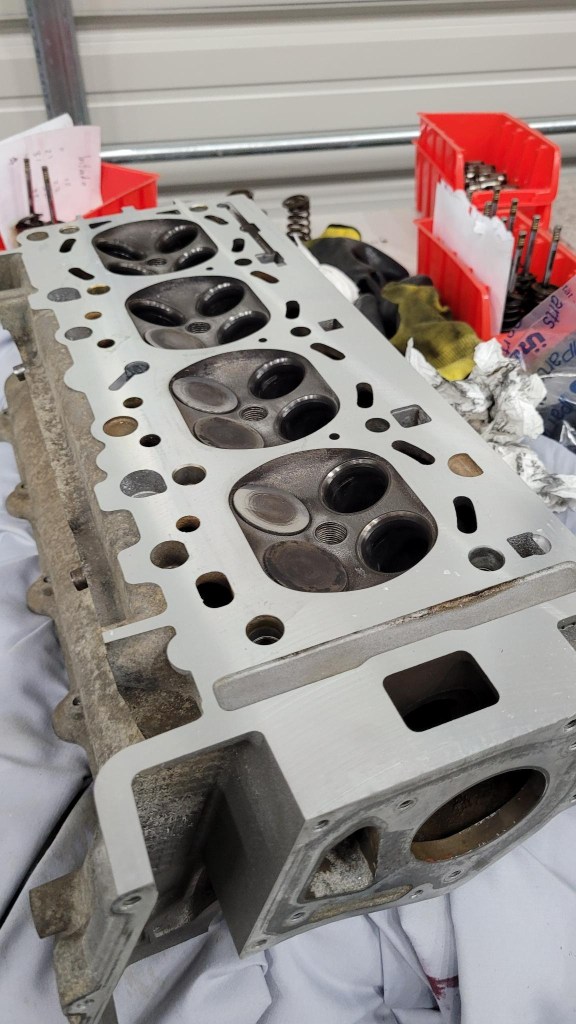
The head came back with a nice clean surface finish. It was now ready for reassembly. The valves got “lapped” with some off the shelf lapping compound and tool. Essentially you quickly spin the valve back and forth with what is liquid sandpaper in between. It takes off a tiny bit of material between the valve and seat making the fit perfect enough to make an air tight fit. Looking at the picture above, the gray ring shows the contact area in-between the head and the valve. After this is done that valve has to be installed in the exact seat it was lapped in or it will not seal correctly. After this the little valve seals got installed, as well as the valve springs and keepers. All the studs placed back in, and cams placed back in.
After the engine was put back together and compression tested meeting factory spec.
Funny enough I ended up buying the car from the owner a few months later.

